How To Test Coil On Plug With Multimeter? Explained and Helpful Tips
If you want to know how to test coil on a plug with a multimeter, then you’ve come to the right place. In this article, we’ll show you how to do just that.
We’ll also give you some tips on what to look for when testing the coil on the plug. Are you aware that you can use a multimeter to test the coil on the plug?
Well, 8 out of 10 people are using the modern engine management system of an ignition coil. Plus, they provide the spark for the engine’s spark plug using the ignition coils.
In simple terms, an ignition coil is a part of the secondary ignition system of the vehicle as an inductive coil.
On the other hand, a multimeter measure quantities such as resistance, current, and voltage as measuring instrument. Please stick through to the end as we unveil everything you need to know.
How to test a coil on a plug with a multimeter
Use a digital multimeter and a basic set of hand tools to remove the ignition coil in the following steps:
- Research your vehicle’s specifications to read the resistance of the ignition coils correctly. They are measured in ohms and specified as a range in the factory service manual for the car.
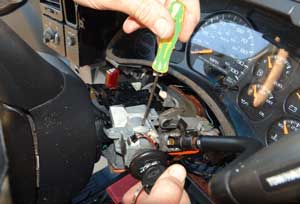
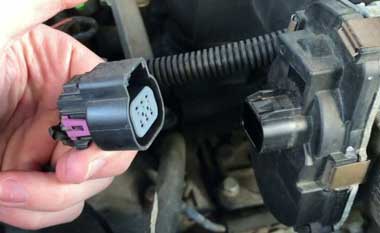
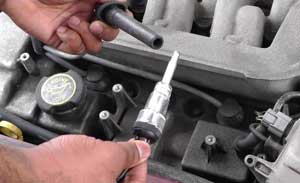
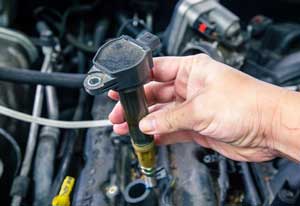
- Locate the coils on your car. They are either mounted remotely somewhere on top of the engine or bolted directly to the spark plug right on the engine.
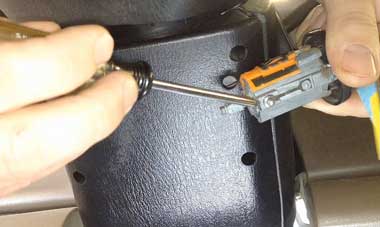
- Use your hand tools to remove the ignition coils and disconnect the wiring harness. They are held in one or two bolts and are easy to remove.
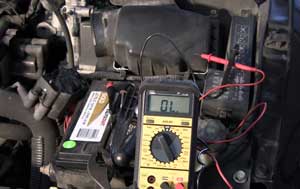
- Check the primary ignition circuit of the coil since they also have a secondary circuit. On the ignition coil, connect the positive and negative leads of the multimeter on the positive and negative terminals.
- To the high output terminal going to the spark plug, connect the multimeter to the positive terminal pin of the coil to test the secondary circuit. Make sure there is the correct operation of the ignition coils if your vehicle has more than one.
- After replacing the coils as required, you can finally restore them.
What is a multimeter used for?
A multimeter is a measuring device common to technicians in the electronic field as well as engineers.
It is used in any engineering workshop or lab as an essential measuring instrument based on the characteristics and different forms in the market. The device is used to measure tools’ electrical properties and wiring industries as its main function.
Moreover, multimeters measure resistance, current, and voltage as the three basic electrical characteristics.
And in an electrical circuit, they also test the continuity between two points. They act like ohmmeters, voltmeters, and ammeters as multi-functionalities.
Besides, they have positive and negative indicator needles over a numeric LCD digital display as handheld devices.
Additionally, multimeters can test power supplies, electric motors, household wiring, and batteries. They deal with requirements based on power sources and circuits, laboratories, and electricity as the different current purposes they measure.
But using a rotary switch or a dial on the instrument’s front side, you can select the different electrical parameters in the multimeter.
Which multimeter setting should be used to test a coil?
You can test a coil to get accurate results using an ohmmeter for your building. However, you will likely look at the dials and get confused to the point of giving up since the multimeter is a versatile device that you ought to understand before using it.
Alternatively, set it at 20 or 200 after the dial is at the lowest ohm setting. Ensure you insert one probe into each end of the wire, then set the multimeter to the continuity setting. However, you will need to replace the wires if the meter fluctuates or does not show any reading.
How To Test 3 Wire Coil On Plug With Multimeter
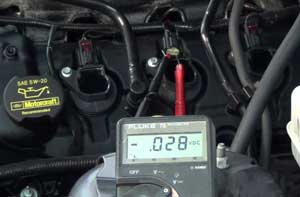
Place your multimeter probes into sockets A, B, and C, with the black end of the probe in socket A and the red end of the probe in socket C.
Adjust your multimeter to measure the resistance on the ohms scale shown on the multimeter’s display. The reading should be shallow, often in the 0.1-1.0 ohms range.
Reverse the order of your probes and take another reading. Note the difference in the two readings, as this will indicate any shorts well.
Remove the probes from the sockets, change the setting of the multimeter to the volts scale, and place each probe into its corresponding socket.
Spin the coils on the plugs and read the voltage. If all three wires are correctly wired, the voltage should be equal or near equal throughout all three wires.
How To Test Vw Coil Pack With Multimeter
Testing a VW coil pack with a multimeter is quite simple, so long as you know the basic steps. Here is a quick guide on how to test a VW coil pack with a multimeter.
- Start by setting your multimeter to ohms. Ohms are used to measure the resistance of the coil pack.
- Disconnect all the spark plug wires from the coil pack and connect the two red leads on the multimeter to each spark plug wire.
- Turn the ignition switch to the “On” position, but do not start the engine.
- The reading on the multimeter should be between 10 and 20 ohms. If the reading is higher than 20 ohms, then it indicates that the coil pack is bad and needs to be replaced.
- If the reading is 10 ohms or lower, it suggests that the coil pack is no good and needs replacing.
How Do I Know If My Spark Plug Coil Is Bad?
Common signs of a bad spark plug coil include:
- Engine misfiring
- Decreased fuel efficiency
- Unusual noises while accelerating
- Difficulty starting the engine
- Visible excessive fuel in the exhaust
- Check engine light illuminated
How Many Ohms Should A Spark Plug Have?
Every spark plug has a resistance rating ranging from 10,000 to 50,000 ohms. The amount of resistance determines how much current the spark plug will draw and how it will fire.
Can You Test A Coil With A Voltmeter?
Yes, you can test a coil with a voltmeter. When testing a coil, a voltmeter is used to take measurements of the current, voltage, and resistance that passes through the coil during operation.
How Can You Test A Transistor With A Multimeter?
Follow these steps to test your transistor:
- Connect your multimeter’s two leads to the transistor’s two ends – the base and the collector.
- Set the multimeter to measure resistance.
- Take a reading – if the resistance value falls between pre-defined levels for the particular type of transistor you are testing, then the transistor should be functioning properly.
- Reverse the leads – connect the collector lead to the base and the base lead to the collector.
- Set the multimeter to measure the current and take another reading.
- If the readings are roughly the same, the transistor should function correctly. You can also take multiple readings to check for consistency.
How To Test An Ignition Coil With A Multimeter?
Step 1: Set the Multimeter
To do this, set it to “Ohms” mode and plug the red and black cables into the multimeter, making sure that the red cable is plugged into the multimeter’s “positive” port and the black cable is plugged into the multimeter’s “negative” port.
Step 2: Test the Primary Windings
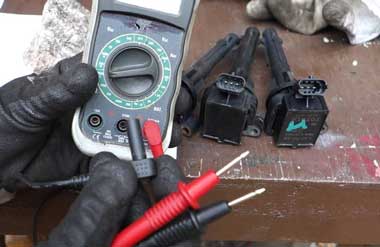
Once the multimeter is set in the proper range, you can now start to test the primary windings of the ignition coil. To do this, attach the two test wires to the primary coil posts.
Step 3: Test the Secondary Windings
The secondary windings transfer the current from the primary coil windings to the spark plug. First, connect the two test wires to the secondary coil posts to test this.
Step 4: Test the Capacitor
The capacitor helps ensure that the ignition coil gets enough energy to create a spark to ignite the fuel.
Step 5: Test the Mechanical Terminals
The last step in testing the ignition coil with a multimeter is to test the mechanical terminals in the circuit.
How To Test Ignition Coil Without Multimeter
Here’s how:
- Start by disconnecting the negative lead from the battery. Make sure that there is no power running to the ignition coil.
- Disconnect both the positive and negative wires from the coil. These are usually one of two different colors; black and white.
- Carefully clean the coil with a wire brush. This will ensure that all electrical connections are tight.
- Using a test light or similar device, connect one lead to the positive side of the primary wire, and the other lead to the negative side of the primary wire.
- If the bulb on the test light lights up, you have successfully tested the ignition coil. If it does not, you will need to inspect the coil to identify the issue.
- Finally, make sure to reattach the positive and negative wires to the coil.
How to test a coil pack without a multimeter?
Did you know that the essential part of an engine vehicle is the coil which transforms into thousands of volts using the battery voltage?
The vehicle will fail to start if the coil gets unresponsive from a spark that helps ignite the fuel engine using a high voltage. However, you will need to replace it if the car fails to start or it is stalling.
First, gather your eye protection tools and safety glasses to save you from an electric shock when testing a coil.
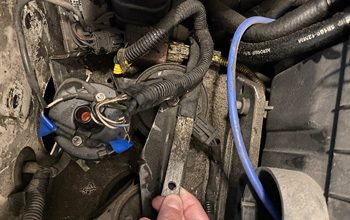
Locate the ignition coil in the engine as the next step. Then open the hood and search for it after turning off the engine of your car.
Please note that the location would be different in your truck, jeep, or car, depending on the type of vehicle you have.
Closely observe the misfire in some cylinders of the vehicle engine after finding the ignition engine and swap the coils.
You will then notice a misfire in any one or more cylinders if any ignition coils are faulty. Lastly, replace the coils and observe misfiring after that.
How to tell which ignition coil is bad
Your engine will not run if you have a bad ignition coil. Alternatively, it is the main reason why your engine does not perform like it usually does. Consider the following signs to figure out a bad ignition coil:
Reduced power
The vehicle will run roughly with a bad ignition coil. Besides, you’ll notice a drop in power or a rough sound or feel when your car is idling. It may not stall and eventually lead to sluggish acceleration.
Difficult starts

You will experience a hard start if the spark plug is not getting the right voltage to create a spark. It is more likely to engines with a single ignition coil, but it can happen with any coil configuration.
Lit up the check engine light
An ineffective ignition coil may register a different code for the problem since all cars are different. But you will notice a code for an engine misfire as a result.
Backfires suddenly

When unburned fuel suddenly escapes from the exhaust fuel, a loud bang comes from the engine backfire. A bad ignition coil can lead to significant engine damage if you do not address it quickly.
Deteriorating gas mileage
A bad ignition coil fails intermittently or disappoints. Nonetheless, decreasing gas mileage is a sure sign that something is wrong, even if your vehicle seems to be performing normally.
Engine misfire
Your engine will run roughly, shake or vibrate from a bad ignition coil when you stop. And when moving at normal speeds, the misfiring engine results in a sputtering or jerking feeling.
How do you check a coil with a multimeter?
You can check a coil with a multimeter through the following simple steps. Please read on.
a) Test the vehicle in park with the engine off to check the coil with a multimeter. Then follow the wire that does not connect with any spark plug and locate the distributor to find the ignition coil. But be sure you protect yourself from shock by wearing eye protection and safety goggles.
b) Take out one of the spark plug wires from the plug and consider using a spark plug tester to save time and avoid damaging it. Attach the spark plug tester to the wire instead of attaching it back to the wire.
c) Use a spark plug socket to remove the spark plug, then prevent debris from entering the combustion chamber by covering the cavity.
d) Reattach the spark plug back to the wire and avoid electric shock by handling it with insulated pliers.
e) To any exposed metal in the engine, touch the threaded portion of the spark plug.
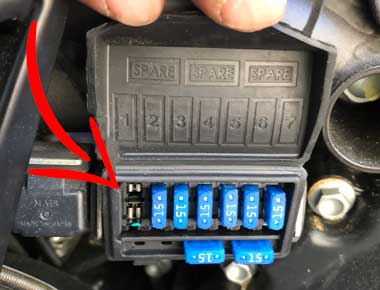
f) Fuse or remove the fuel pump relay to test the spark on the coil. If you fail to remove the fuel pump relay and leave it flooding with fuel, it may result in serious damage.
g) Crank the engine to provide power to the spark and the car’s electrical system.
h) You will notice a bright blue spark jump across the spark plug gap with a working ignition coil after cranking the engine. However, a failed ignition coil has no sparks and implies a slow or faulty electrical connection, while orange sparks imply a bad sign of insufficient electricity to the spark plug.
i) Reconnect the wire and carefully re-install the spark plug
Frequently Asked Questions
1. What is a multimeter?
A multimeter measures the electrical properties of industrial wiring and tools as a virtual measuring device in workshops, electrical labs, and electronics.
It sorts out troubleshooting issues and other circuit issues. Plus, it measures the current, voltage, and resistance as the different electrical properties.
Moreover, a multimeter selects different parameters to measure electrical properties using a rotary switch on the front panel.
2. Is a multimeter AC or DC?
Alternating current (AC) circuits are dangerous, although most multimeters can measure them. On the other hand, the setting on the multimeter with straight lines and not curvy lines is the DC; you should generally stick to them.
Besides, a wall outlet with AC or main voltage works well. But be sure to use an AC tester if you need to check to see if an outlet is on. Before testing an AC circuit, please make sure you go slowly and double-check everything.
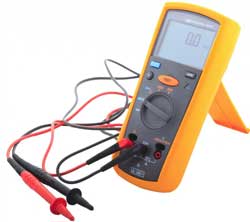
3. What is the most commonly used multimeter?
A digital multimeter is a current and most widely used tool, even after that analog. It measures the voltage, current, and resistance in any troubleshooting circuits as it is commonly used to test different electronic instruments.
It provides accurate reading even in small voltages through the increased use of electric control, cost-effectiveness, and ease of reading.
4. How to test ignition coil with test light?
First, confirm whether your ignition coil is good or bad before replacing them. Nevertheless, other faults like internal problems apart from bad or weakened insulation can interfere with the ignition coil operations, regardless of the fineness of an ignition coil winding. Use a test light depending on your application on either low or high voltage for the tests.
Ground the test spark plug and connect it to the output terminal of the ignition coil. Remove the oil system fuse to prevent the engine from starting on systems with more than one coil. Lastly, inspect the spark condition by cranking the engine.
Conclusion
There’s a trend towards multifunctional digital multimeters with high resolution and precision as they display values in an easy-to-read format.
However, you can be undoubtedly confused since there are so many types available in the market. Please keep in mind the functions you are going for to get the model that best suits you.
Moreover, don’t forget the operating environment and safety factors before settling for a good multimeter.
I hope you’ve discovered everything you needed to know about multimeters in great detail. Now go ahead and explore; Better Luck!